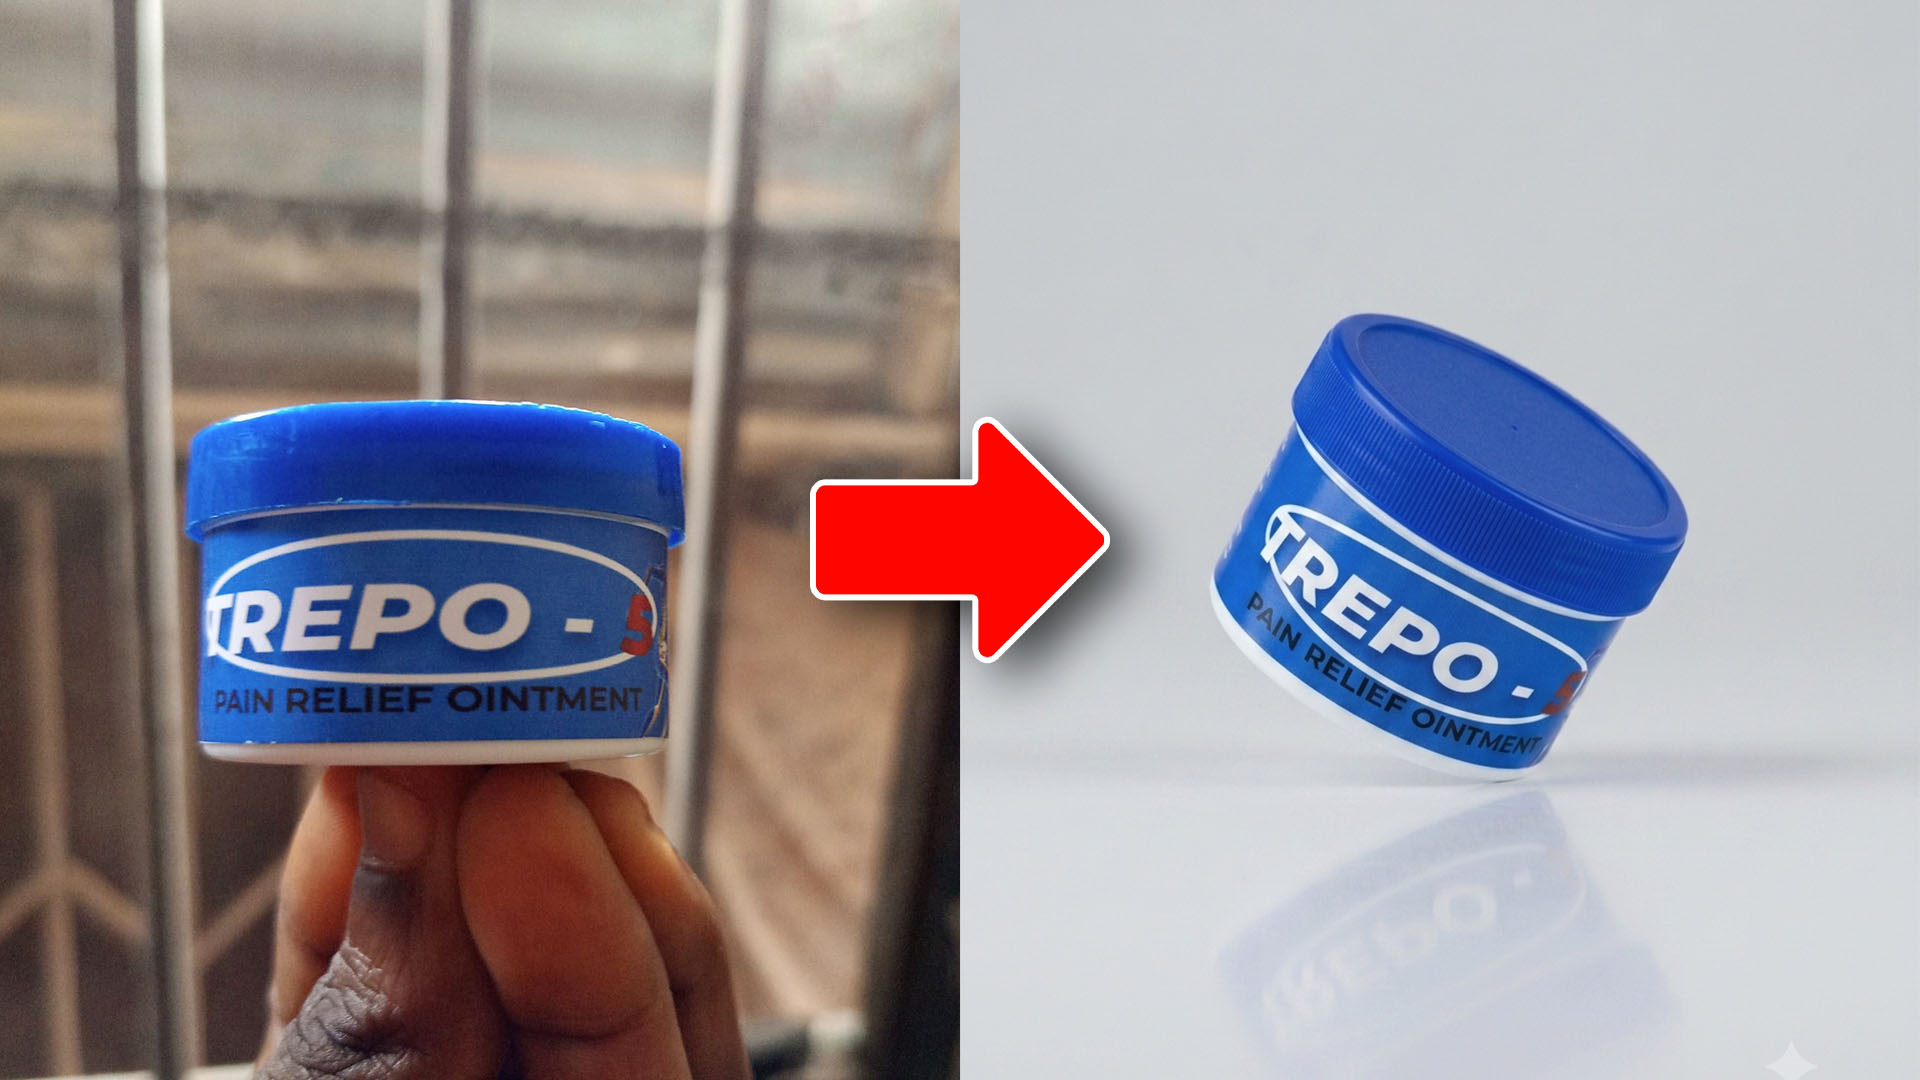
How AI Image Generation Fits Into My Design Workflow
A quick look at how AI image generation speeds up creative work, using a real before-and-after example and the simple prompt behind it.
It's amazing how far AI has come in today's tech world.
What's even more impressive is its image generation and editing capabilities. What once required a professional photoshoot, you can now generate in minutes with AI.
And no, I'm not saying an AI generated image is better than a professionally shot one. That's not the point here.
A Real Scenario
Take this as an example. A client sends you a sample for a flyer you're designing. You need a good picture, fast. Maybe the budget doesn't stretch to a shoot. Maybe there's just no time.
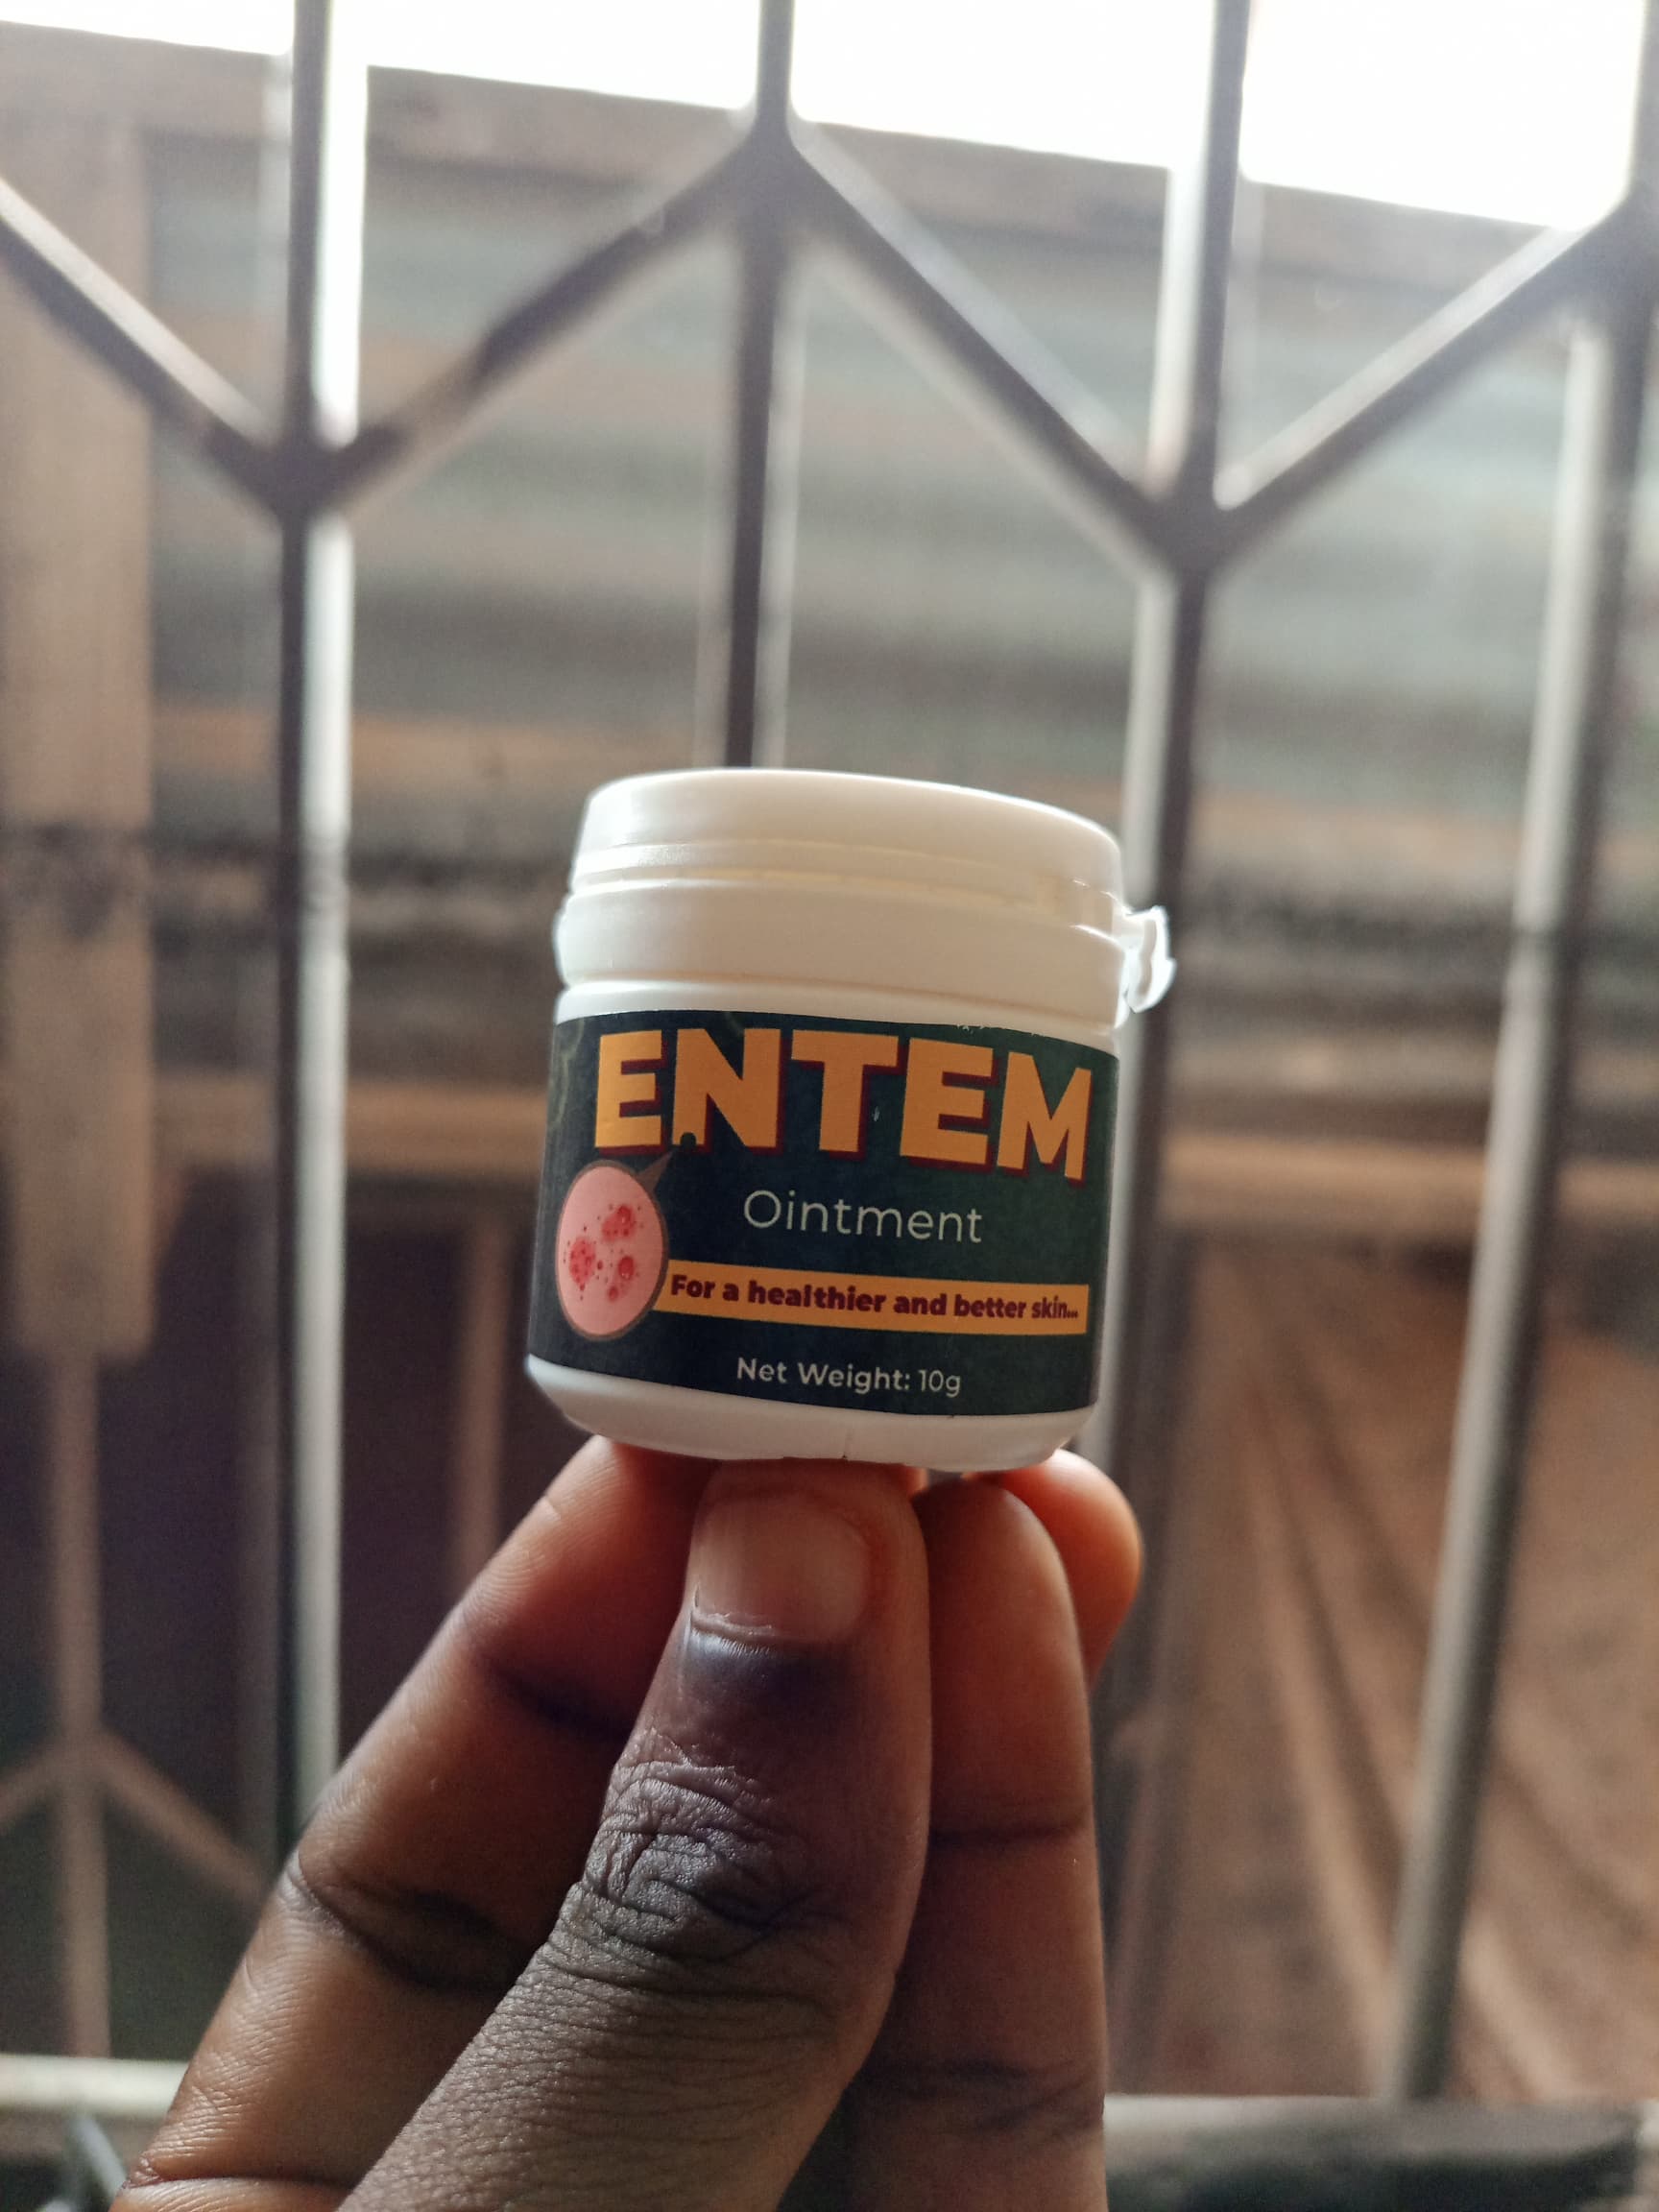
This is where it gets interesting. It's incredibly convenient to snap a decent shot on your phone, run it through an image generation AI model, and get a clean, usable image for your design. No studio. No shoot. Just AI speeding up your workflow.
Before (phone photo):
After (AI generated):
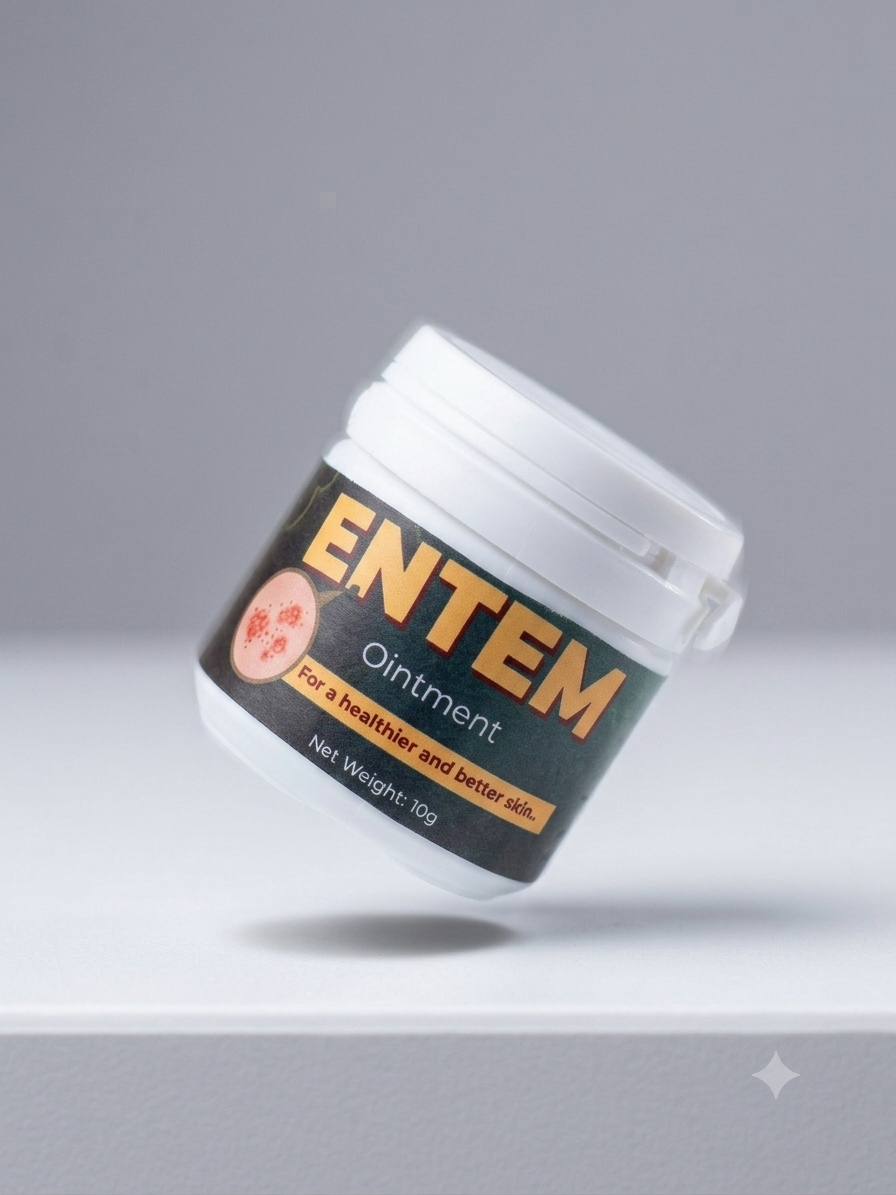
That's really all there is to it. You're not replacing quality work, you're removing a bottleneck.
It's a Tool, Not a Replacement
You've probably heard this before: AI isn't here to replace creatives. It's a tool to speed up the work you already do.
The designers who'll thrive with this era aren't the ones ignoring it or the ones relying on it entirely. They're the ones who know when a quick AI generated image gets the job done, and when the project actually calls for the real thing.
That balance is the whole game right now.
The prompt I used to get the AI output (with Google Gemini)
Write a detailed prompt for making this image sharp and clear and as if it's a photoshoot image without the hands and a plain photoshoot backdrop.
Then
Run the prompt and make it 3D-like, slightly tilted at the base
Share this post
A quick look at how AI image generation speeds up creative work, using a real before-and-after example and the simple prompt behind it.
Related Posts
-
What I Finally Understood About Graphic Design
The biggest improvement in my designs didn't come from learning Photoshop. It came from asking one simple question before I started designing.
Jun 15, 2026 -
What I Didn't Understand About Graphic Design
For years, I thought graphic design was about making things look cool. The result was cluttered, confusing designs and a lesson that changed how I see design today.
Jun 8, 2026 -
How Are Fonts Made and How to Make Yours
Poppins, Arial, Montserrat,Tahoma... How are these fonts made? Here's a breakdown and an extra tip on how to make yours easily
Jun 3, 2026